Showing posts with label tutorial. Show all posts

8/14/12

One photo bracelet DIY

 
 Let's ignore the quality, shall we? 
I've never embroidered anything in my life before a few moments ago. Really. haha!!
I may try this again, only with a bit more 'planning'.

What you need:
-Denim scraps (have you made jeans into shorts recently?)
-Embroidery floss (friendship bracelet style)
-Sewing needle (large enough eye for the thread)
-Clasp (hobbylobby or ANY craft store)
-Jump rings or split rings, and chain in case you make it too small (oops)
-Ribbon Crimps. I got mine here on etsy.
-Scissors and jewelry pliers.

Start by taking your piece of denim and cutting a long thin strip. Wrap this around your wrist and mark with a pen where you need it cut. Mine has a chain because I cut it too small for my wrist, so make sure you cut it long first, then take off little pieces until it's perfect. Thread up your needle with the thick embroidery floss.
I would recommend drawing out whatever design you want with a pen to be sure you have an even guide to follow, and that it will all fit (so it doesn't need to look like mine. Another oops lol!!)
Start threading through the back so that your knot and edge of the thread aren't visible. Stick with straight lines. The back won't be visible so focus only on the front and your clean lines.
Once you have your writing done, grab your ribbon clamps and your pliers and close one on each end.
 Add your jump rings and clasp, and DONE!

Optional: Before adding the end clamps, cut another piece of denim to the same size, and use fabric glue to glue it to the back of your designed piece. This will make it a little more sturdy, and will hide any thread on the back side. The clamps will still easily fit over top of both pieces after they're glued together.
Optional: Buy a product called "no fray" (i think that's what it called?) 
to spray on the edges of your denim to stop any fraying of pieces off the edge.

7/15/12

Geometric Painted Bags


Gorgeous isn't it? 
The perfect mix of the red pattern underneath, with a spunky geometric print on top.
Can I say spunky? Oh well. I just did.

via pinterest

You can take these same concepts and design your own clutch. 
Find something that isn't too tough to paint. Meaning, pick a sturdy leather or vinyl. I'm sure you can do this on softer leathers as well, but it might be easier on something a bit stiff. Nab some acrylic paints in whatever color you want, and go crazy. To get long straight lines, painters tape might be the way to go. For other patterns, look for fun stencils to use. With stencils, you may even be able to use spray paint.

 
Head over to Mr. Kate to find a few other ideas.
 They've painted up quite a few bags!

6/26/12

DIY your way through Denim

Quick! Before it gets too hot out to wear long denim!
(what am I saying? It was 109 here today. I think we've already hit that mark) 

Stamp your own geometric shapes on Studs.and.Pearls

 
Ombre jeans with dye and a spray bottle at  Stripes.and.Sequins

 
American Flag jeans for Fourth of July? Yes! Check out N-Stitches for directions how.

6/15/12

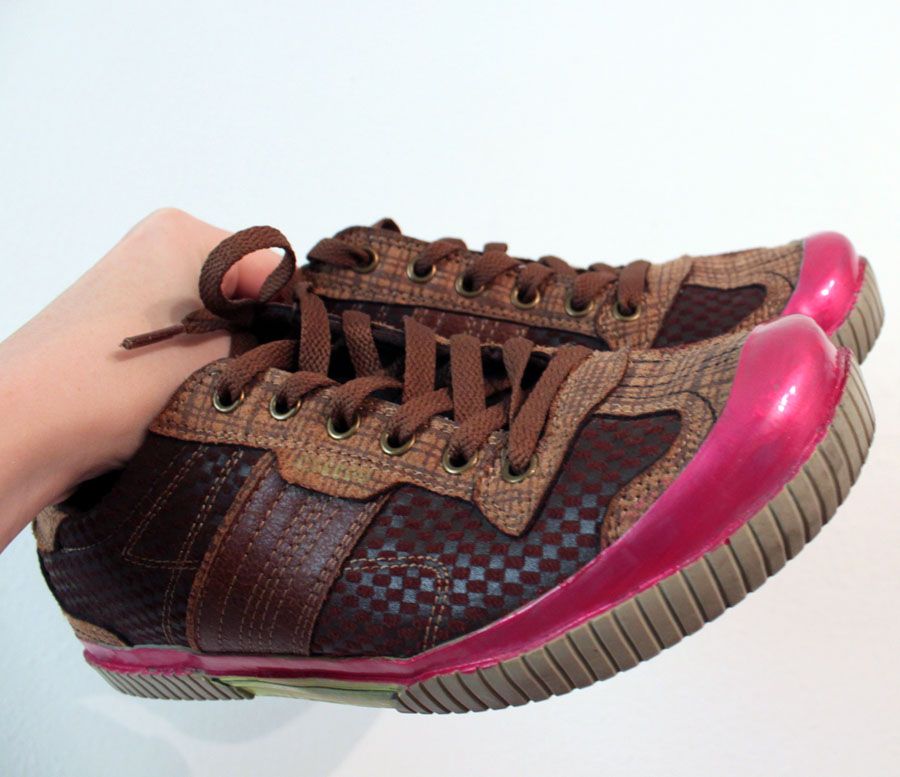
Craft It - Give old shoes a Neon Pop DIY


 In one of my 'cleaning out my closet' posts, I mentioned a pair of shoes that weren't worth keeping in the condition they were in, but were too perfectly good to throw away. The best thing to do in that case?
DIY it!

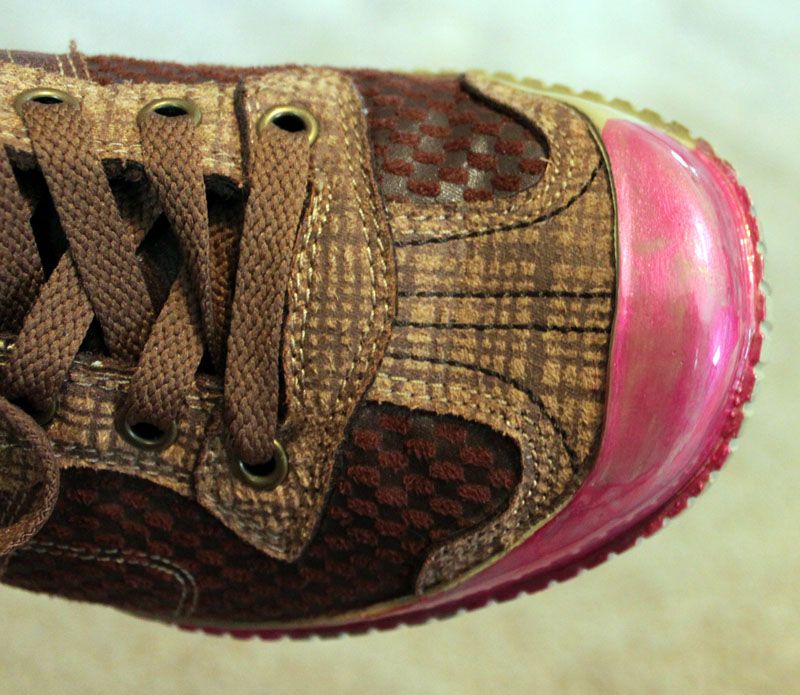
This pair of shoes has been fantastic. Honestly, i've only worn them a small handful of times. 
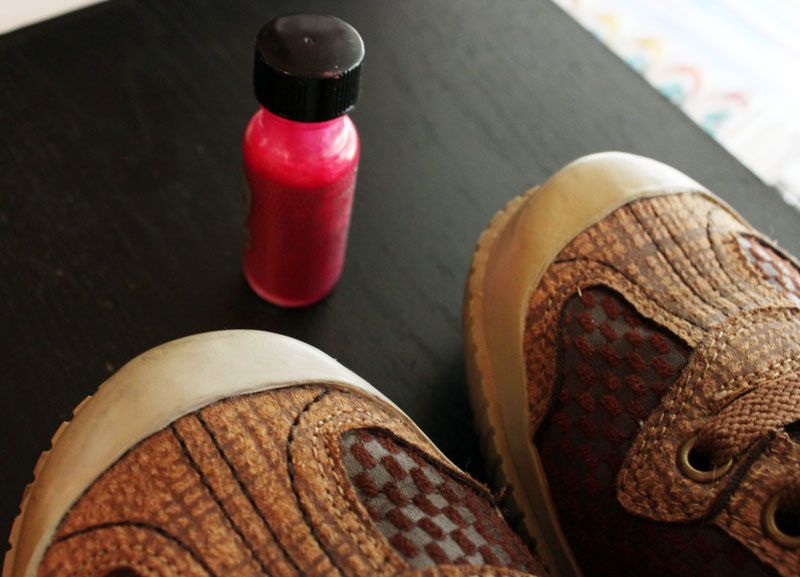
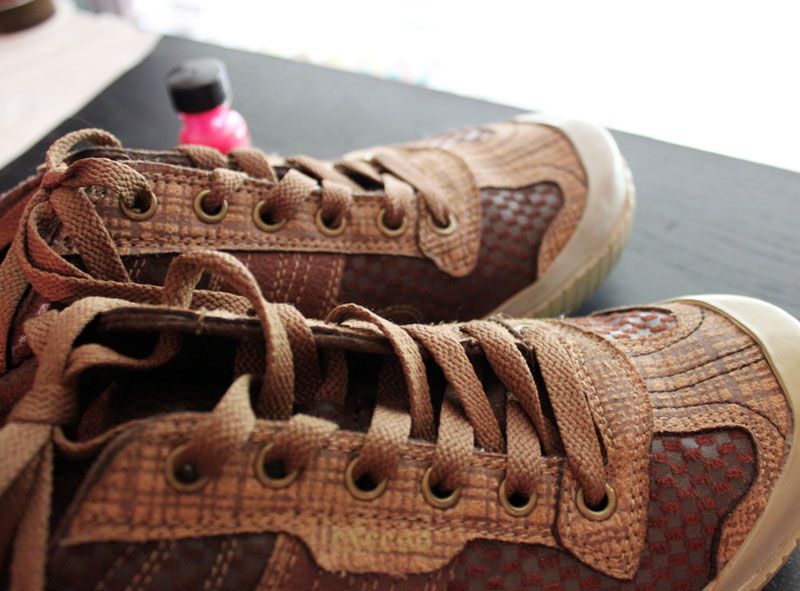
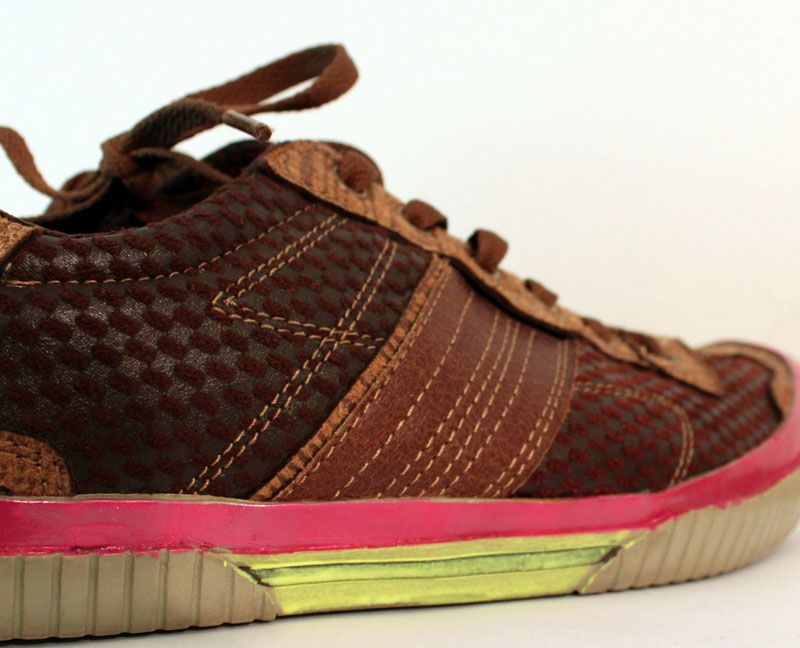
I tend to wear more blacks than I do browns. Somehow while tucked away somewhere this lovely pair started to discolor in the front rubber piece. The color difference is enough that you can tell from pretty far away that one shoe is much more faded than the other.
Can you tell how dark the right one is compared to the left?

Things you need to fix this:
Nail polish

That's it! I could use paint, but I wanted something I already had on hand. You could use spray paint, but it would take a bit longer since you'd have to tape off the rest of the shoe. Most acrylics aren't as shiny as nail polish, and I wanted this pair to really POP by the time I was done with them.

The nail polish is a clearanced bottle from Hottopic. I need to remind myself why they clearance things sometimes... this stuff really isn't a long lasting nail polish. (plus, it's a little goopy. Ick).

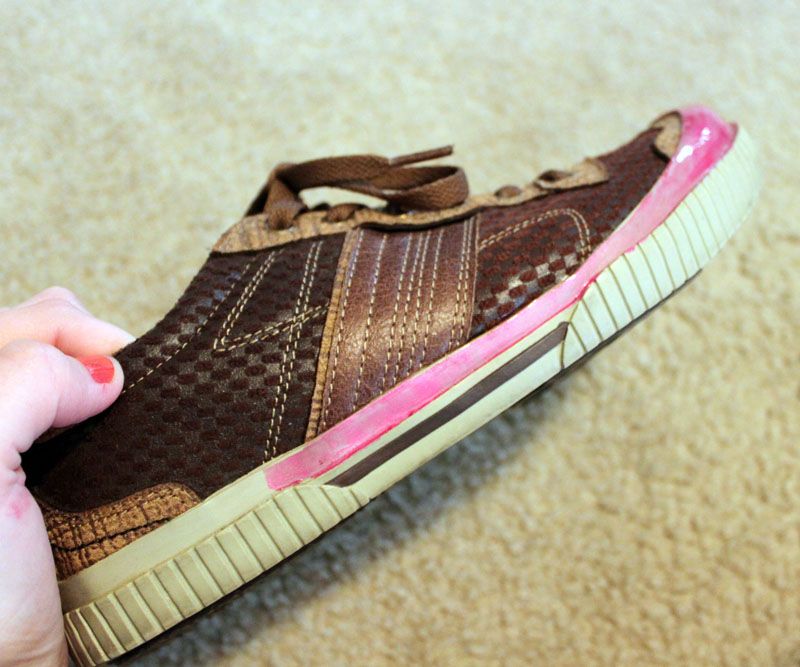
I went around the top and outside of one shoe, then the other... then went back for the other side and back. This gave one side a little bit extra time to dry. I would recommend this as I learned the hard way, and rested a shoe on my leg as I was painting the other side. Ooops! 
This was a pretty thick coverage polish, so I only used two coats. Grab a few Q-tips and soak them in nail polish remover before you start so that you can quickly remove any mistakes or drips from other areas.
I finished mine off with a coat of bright yellow from a paint marker on the outside edges. 

Get creative. You can go with one color, or use a mix of a few different ones.
Try different shades of the same color for a nice ombre effect.


1/7/12

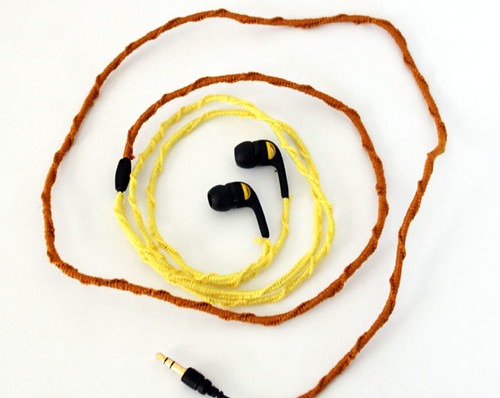
Custom Color Headphones DIY

Ever want to know how to give your black plain earbuds a little bit of color?
Ok, maybe quite a bit of color...

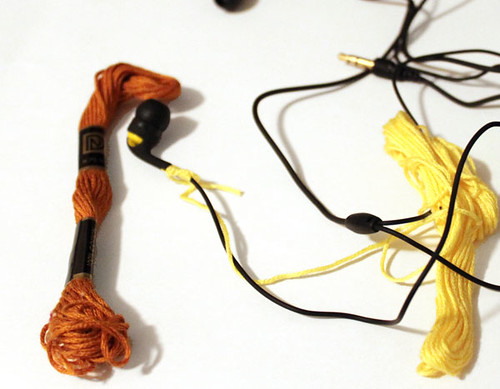
Embroidery floss. 3 skeins
Scissors
Earbuds or headphones


Do you remember making friendship bracelets when you were younger? 
These wrapped headphones were made the same way. If you don't quite remember the steps, here's a good place that shows you the swirly twirly pattern.
That's the process you're going to use.
I used 3 skeins of thread. One for the bottom piece (which was the perfect amount), and two for the top (and I had some left over).


Start at the top of one pair. 
Take your embroidery floss (or thread. or yarn. whatever you're using) and tie a double knot. 
Cut the extra trim off the short end.
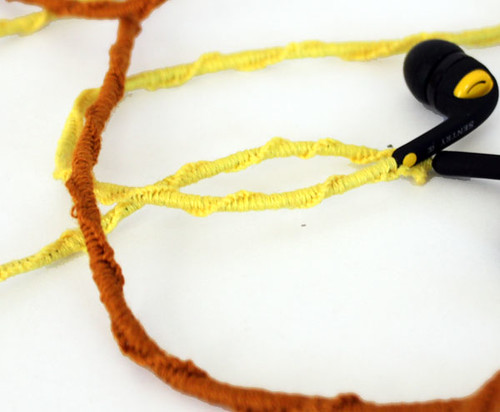
Then tie one knot after another with your long piece, going down the wire, just like you would your friendship bracelet. Each tie will produce a tiny knot. Every few ties, turn your wire a little so that the knots create a swirl effect down the wire.

If you haven't done this technique before, it could take some practice. Maybe start out with some extra thread and try the original bracelet first.  With some experimenting, you can figure out how to get shorter or longer swirled knots by how often you "turn" the wire as you go.
Once you get to where the Y connects on your headphone wire, start going up the opposite side. 
You should end at the top of the other ear piece.
If you run out of thread, just tie another piece onto yours, trim the ends and keep going. 
It won't be noticeable in the final outcome.

Since my ear buds were yellow, I went with two colors for this. 
Yellow for the top and copper for the bottom.
Get creative! You can use one color, even use multiple pieces to get a striped look.

Last step? Plug into your ipod, and make everyone else jealous.